
How to Install the Sprinter Engine Oil Cooler
Nov 03, 2025
A Sprinter engine works harder when it's loaded — heavy tools, a full camper build, or a long towing day will push oil temps higher than the factory cooling system was tuned for. High oil temps break down viscosity, which accelerates wear on the turbo, the bearings, and the rings. An auxiliary oil cooler is the cheapest insurance against that wear.
Our Sprinter Engine Oil Cooler kit ships with everything you need to do the install in an afternoon. This guide walks through the whole job, start to finish.
Necessary Tools
Pull these out before you start. It'll save you twenty minutes of digging mid-job:
- Flashlight / headlamp
- Oil filter wrench
- Body clip tool
- Sockets: 8mm, 10mm, 13mm, Torx T25 and T30, Inverted Torx E10 (or 8mm)
- 1" stubby wrench or AN wrench
- Drill
- Drill bits: 1/8" (0.125"), 3/8" (0.375")
- Marker or Sharpie
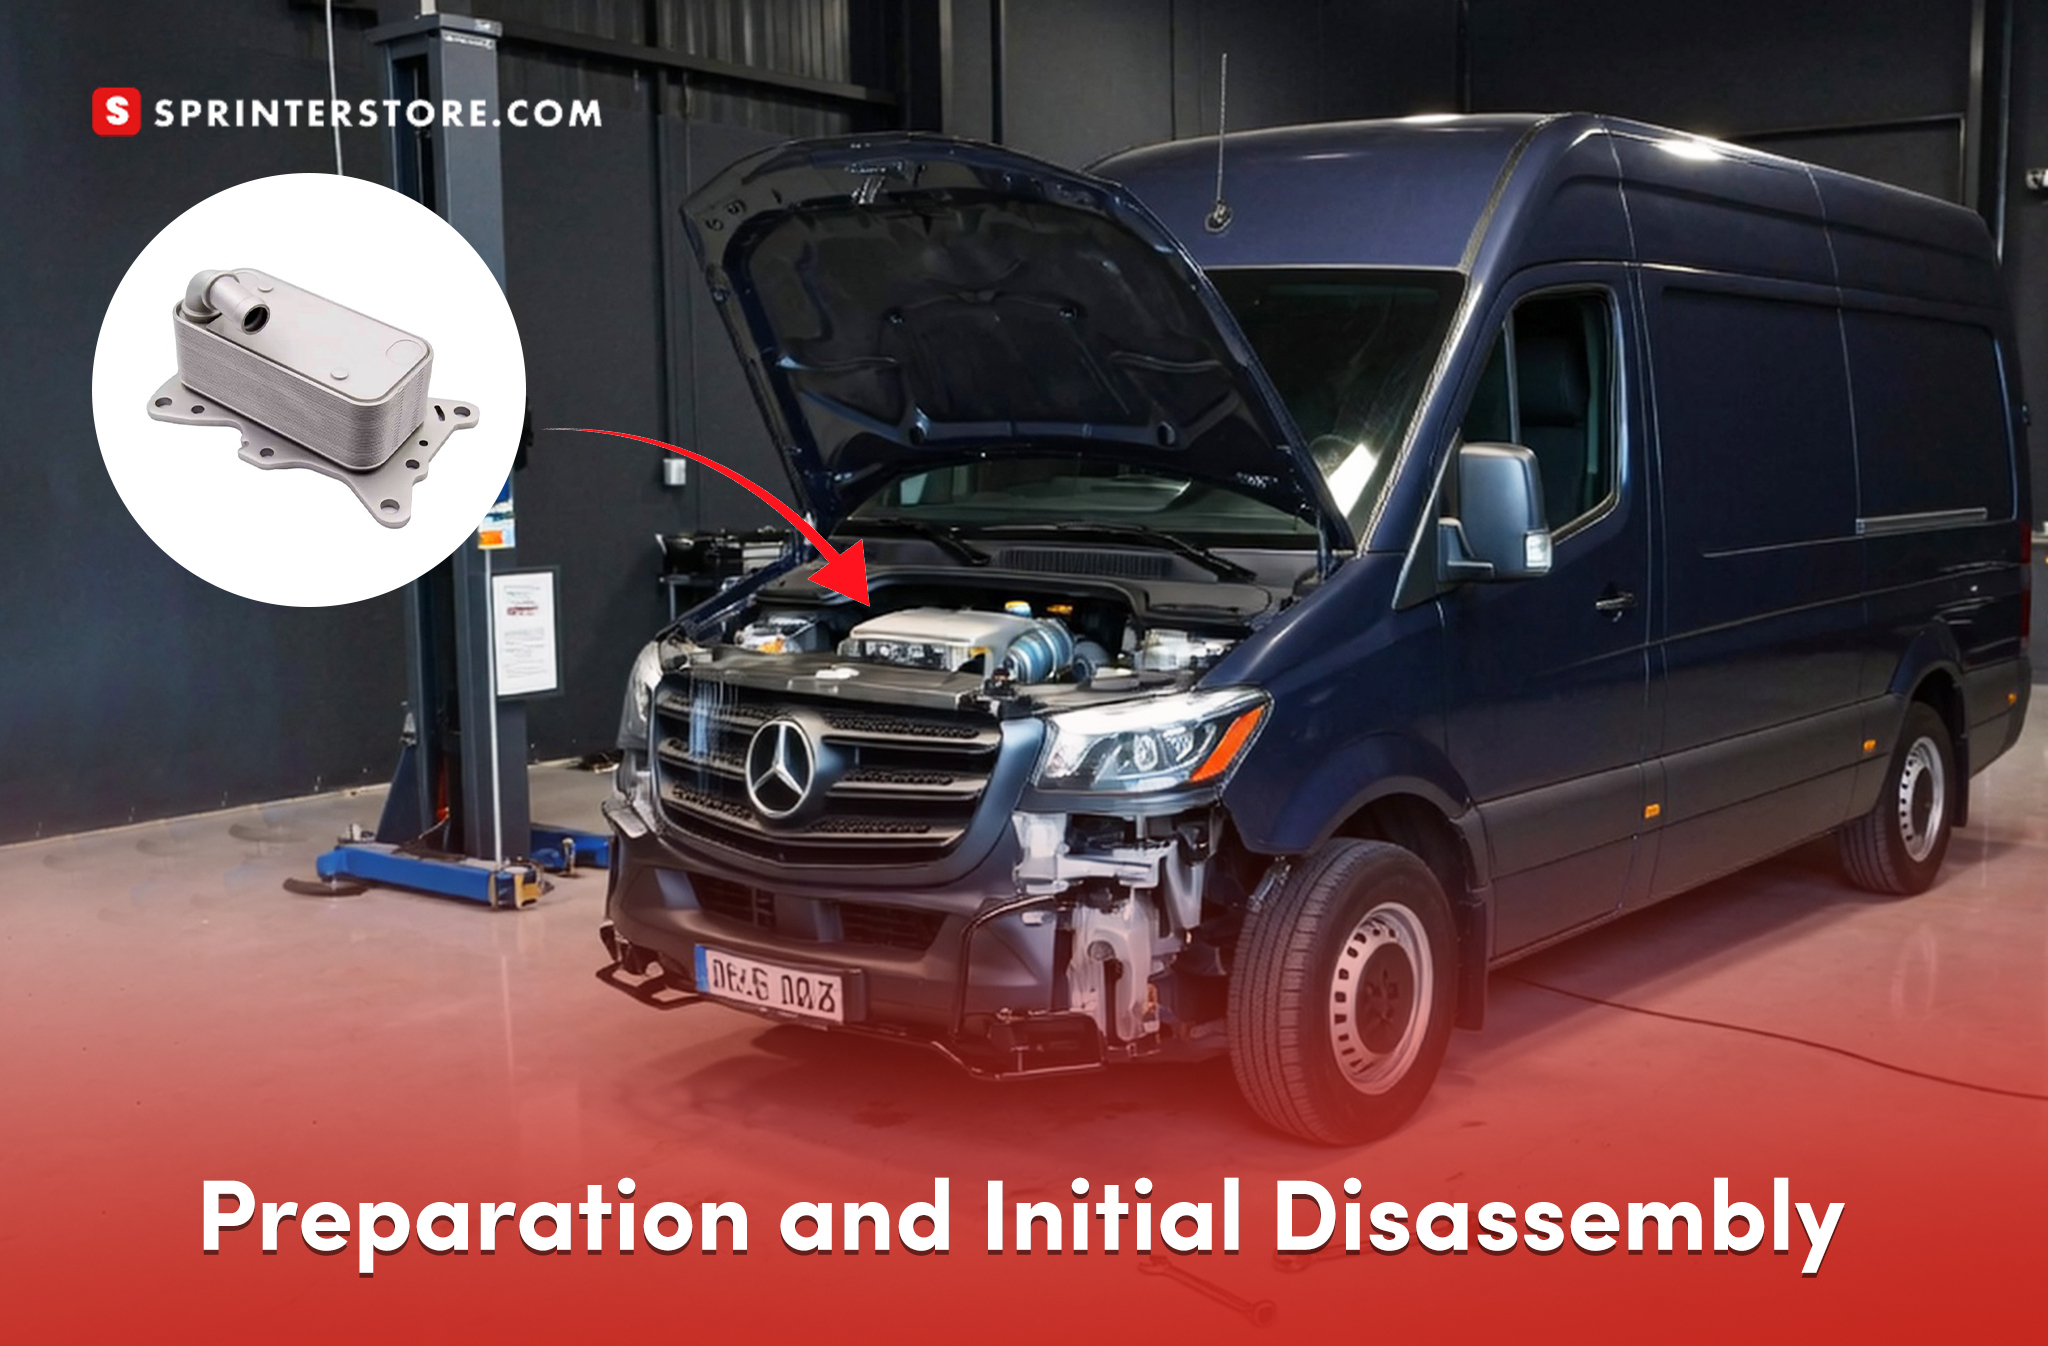
Step 1: Preparation and Initial Disassembly
- Locate the oil filter housing and power steering reservoir.
- Loosen the oil filter cap so oil drains back down out of the filter housing.
- Remove the front bumper:
- Pull the plastic clips (two underneath per side, four in each fender well).
- Unplug the parking sensor harness and fog light connectors.
- Remove the three Torx screws at the top of the grille.
- Remove two more Torx screws behind the grille (midway down, vertical orientation).
- Set the bumper aside somewhere it won't get scratched.
Step 2: Mounting the Oil Cooler

- Use the supplied template to locate the four drilling points on the top section of the core support. If there's a vertical support, use it to center the template.
- Tape the template in place, or glue it to cardstock first if you want it stiffer.
- Drill all four holes with the 1/8" bit.
- Pull the template, then enlarge each hole with the 3/8" bit.
- Install the nut serts:
- Thread the nut sert onto the M6 screw using the installation tool, in this order: SAE washer > floating aluminum hex (13mm) > star washer > nut sert.
- Insert the assembly into the drilled hole and tighten with a 10mm wrench while holding the hex tool in place.
- Repeat for all four holes.
- Bolt the cooler brackets to the oil cooler using the M6 x 8mm hardware. Leave them loose for now.
- Orient the cooler so the bottom fitting (the inlet) is on the passenger side.
- Attach the rubber isolators to the nut serts in the core support. Snug — don't crank them.
- Mount the cooler to the rubber isolators with the M6 nyloc nuts and washers.
- Center the cooler, verify the isolators are aligned, then tighten everything down.
Removing the windshield washer bottle gives you a lot more room to work in the next steps. Do it now.
Step 3: Removing the Oil Filter Housing
- Remove the three bolts holding the power steering reservoir — left, right, and rear (E10 or 8mm). Skip this if you have electric assist power steering.
- Remove the two bolts on the upper bracket of the oil filter housing (the short 90° tab, E10 or 8mm).
- Put a rag over the belts and pulleys. Oil will spill.
- Clean the area above and below the oil filter housing so debris doesn't drop into the engine.
- Remove the oil filter cap and filter.
- Unscrew the three T40 bolts securing the oil filter housing, then lift the housing off.
- Drain any remaining oil. Leave the rubber gasket on the engine.
- Thread the 90° AN10 O-ring fittings into the oil filter sandwich block.
- Seat the rubber gasket in the sandwich block and attach the block loosely to the oil filter housing with the supplied M8 x 58mm bolts.
- Reinstall the housing (with sandwich block attached) onto the engine. Make sure it's aligned.
- Tighten the three M8 bolts evenly as the gaskets compress.
Step 4: Reinstalling the Power Steering Reservoir
- Put the front power steering reservoir back on the oil filter housing. Don't tighten yet.
- If needed, loosen the bottom hose clamp and shift the hose down about 3/16" to clear the new bracket.
- Replace the front reservoir tab with the supplied three-bolt bracket.
- Reinstall the oil filter and cap.
- Secure the rear reservoir tab with the supplied two-bolt bracket.
- Tighten all the reservoir bolts.
Step 5: Routing and Securing the Oil Cooler Lines
- Find the "OUT" and "IN" ports on the oil filter sandwich block.
- Oil should flow: engine → OUT → bottom of cooler → top of cooler → IN → engine.
- Make sure the check valve hinge is in the upright position and lock it there with a zip tie.
- Attach the AN10 x 22mm O-ring fittings to the oil cooler.
- Connect the 180° fitting at the bottom of the cooler, then guide the line from the passenger side (right) across to the driver side (left).
Cut and assemble the oil lines
- Mock up the fittings and mark your hose lengths before cutting.
- Cut to length. Keep the routing smooth — no sharp bends, no pinch points.
- Install the hose clamps and crimp them securely.
- Zip-tie the hoses away from sharp edges and moving components.
Step 6: Final Checks and Reassembly
- Walk through every bolt and fitting. Tight and secure.
- Start the van. Confirm the low oil pressure warning does not come on.
- Look for leaks. Every fitting.
- Top off the oil — the cooler kit holds roughly one additional quart.
- Reinstall the front bumper, parking sensor plug, fog light plugs, and anything else you pulled off.
Final once-over
Take it for a short drive, then pop the hood again and check for leaks a second time. That's it — your Sprinter is now running significantly cooler oil temperatures under load, which is the single cheapest thing you can do to extend the life of the engine and turbo.
Questions about the kit or the install? Call or chat on SprinterStore.com — we can walk you through it.